I know that this is an embroidery blog but sometimes, you just gotta learn about the little things you will need when you give your beautiful gift.
When you see the beautiful bows at a special event, I always figured a magical, nimble-fingered elf came when no one was looking and creating the bow that was not lopsided and picture perfect. AHA! I found the answer, the elf has given me the trick!!! I was actually able to create my best bow the very first time.
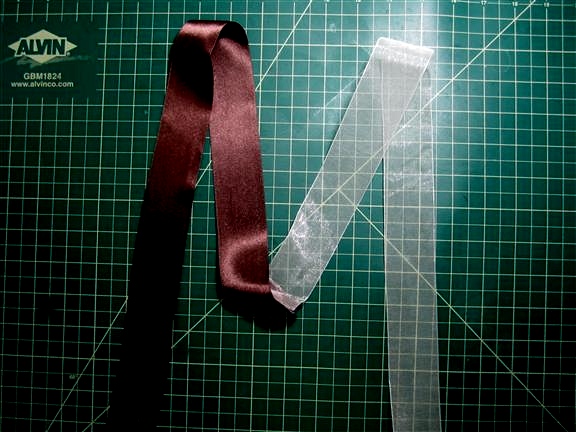
Start with about 40" (1.01m) of fabric ribbon. The paper types of ribbons work fine as well, but it is easier to work with fabric ribbon for your samples. Paper types will have some wrinkling.
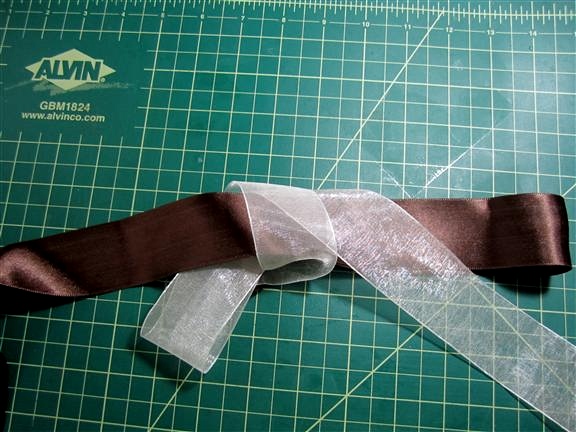
Layout your ribbon as shown. Most fabric ribbons are the same on both sides, but some may be different. Begin with them showing (up side) their right sides in a "M" shape.
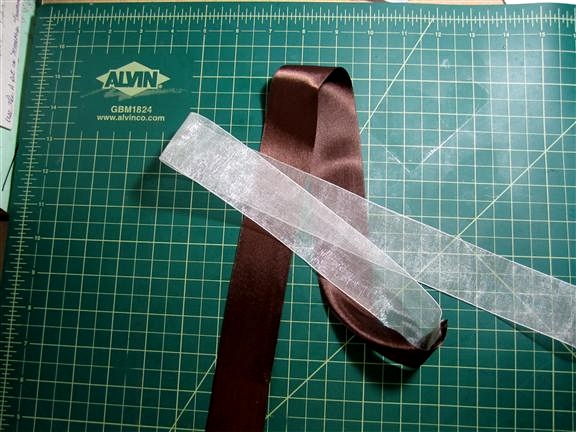
I have used two different colors so it is easy to see, believe me, when I saw the drawing in black and white, it was difficult to follow! Place the right loop over the left loop. Make sure to keep the middle of the "M" in place.
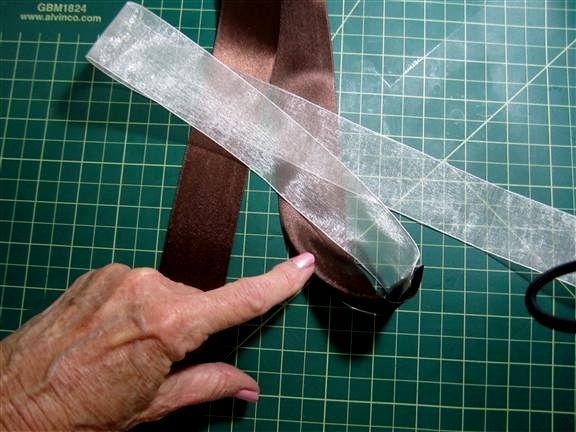
Take the right loop under the left and BACK UP through the middle of the "M" loop (I am pointing to it). It is the only way you will get a knot of any type, so if you miss the loop, start over.
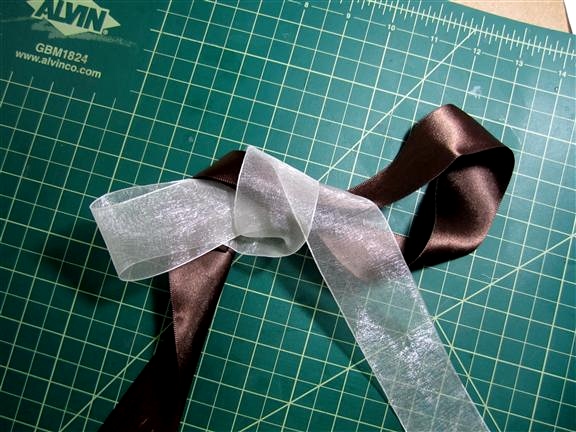
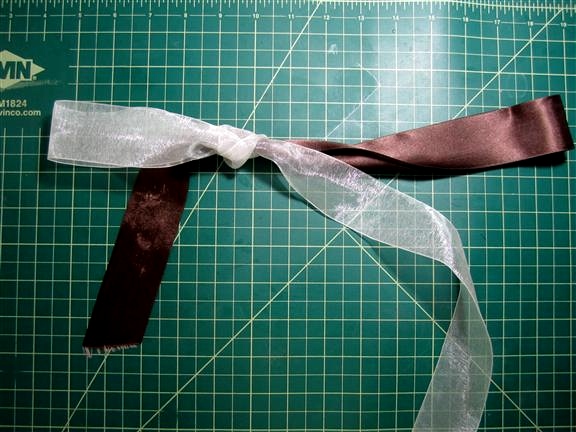
The results look like a mess but it is correct. Next you make sure that your loops are on the correct side and then work toward pulling the loops outward. This is where the long tails really help. If the tails are too short, you cannot pull the loops out to their appropriate position. If needed, work loops and tails back and forth so that the knot becomes engaged.
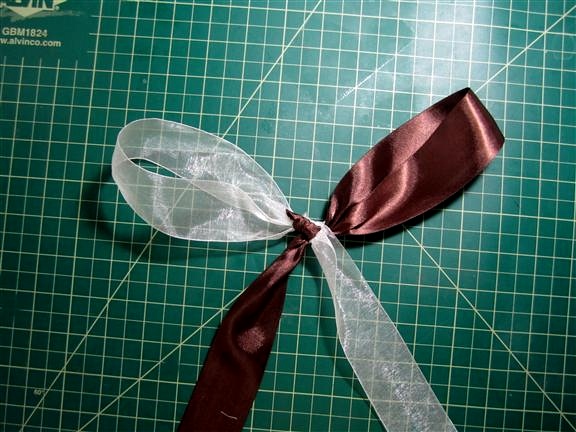
Do lay out your pieces as they will eventually lay in a completed bow. This is all taking longer to say than it will take you to make!
After you practice some of these, it won't be necessary to have to rework as much, but initially, keep your end bow in mind as you work.
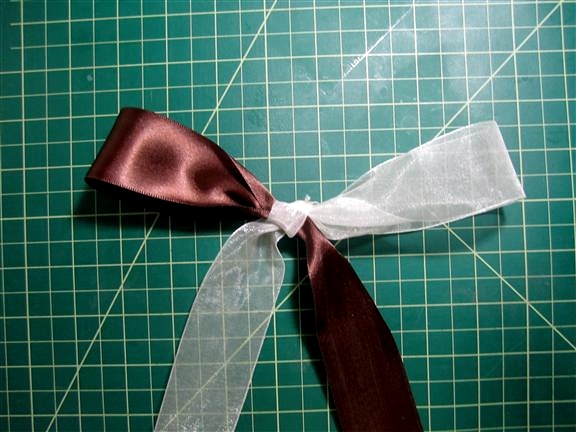
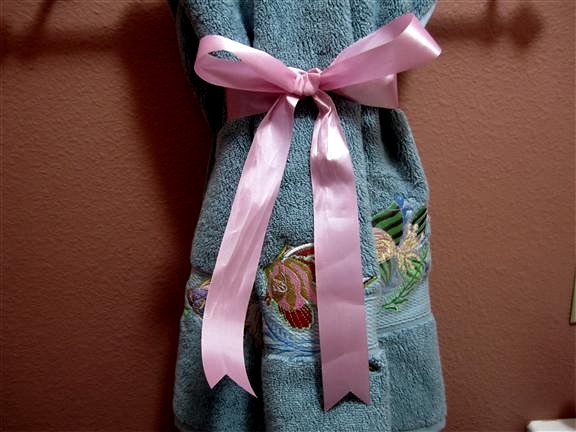
Here is one side of the bow - -
And here is the other side. As I worked through my bows, I often found the back side to be more attractive but you may find it different. How about this one in organza?? I think the wider the ribbon the more dramatic the bow.
The last thing you need to know is that I have not been able to determine how to create a bow that has something attached, like this towel. If you observe all the 'pretty as a picture' bows for sale, you will see that there is either an attachment like a 'twist tie' or they are simply an adhesive flat back. I always assumed that there was no 'loop' to stuff my towel into because they did not want to give me extra ribbon or too short a loop to use on a package. That is not the case. I worked with this for several hours trying to make it work with a box but could not do it. I could use a VERY long middle tail on a box but the bow did not work.
Moral, this bow on the towel is for 'showin, not usin.' I took a piece of ribbon to wrap around the towel, twisted it and attached it, with a safety pin or craft glue would have worked, and the bow was ready for its debut.
This time, I am also showing one of the Freebie designs that is really an outstanding design. Freebies normally are not very innovative, but this one IS HEAD AND SHOULDERS ABOVE THE REST.

Obviously, this is a button hole. Why do I think it is special? Well, last summer I had my favorite shorts with a little problem. It had a metal latch and a metal grabber and the latch gave out. Now this was not like a 'hook and eye' because it was much larger. The hole that was left behind was making the shorts unwearable. Recycle Time! Then I took this design and used it to make a sturdy button hole for my garment and I have my favorite shorts back again! This design is from Ann's Club. So, believe me when I say that being a member has its priviledges. It is absolutely worth the cost and after all, you can pay $10 for something that is not worth a dime or a little more and have excellent value.
Alphabet Xpress is on sale this week. From the very reasonable price of $59.99 down to $35.99. Let me tell you about my experience.
I recently changed from a BabyLock 10 needle home machine to an SWF/E-T1501C, a 15 needle commercial machines. I actually thought that it was going to take my embroidery to a new level. The software was $5,000 and appeared to be a good program.
Very long story short, the Alphabet Xpress is head and shoulders above the $5k software in lettering. I am not using the expensive program, I am using AX. I have been embroidering for over 12 years and AX is excellent. It does not do any designs but for lettering, ♪ ♪ ♪ nobody does it better! ♪ ♪ ♪