in

Ann The Gran Community

Beautiful people who make beautiful things.

Enter your e-mail to receive updates whenever the Avid Embroiderer is updated

Posts

My Favorite Items

The Avid Embroiderer

The Avid Embroiderer

As an avid embroiderer, my blogs discuss my experiences. I don't claim to be an expert because embroidery is changing so fast, it is difficult to keep up with everything. If you have questions, please do add them in the 'Comments' section. I will respond.

Nailing a Corner

I am constantly seeking something unusual for my bridal shop.  I enjoy bringing something really unique for selling to brides who appreciate beautiful things that I can product without fail over and over again.

The first thing that has to be absolute is that the design is well digitized.  Seeking them is always a challenge.  For one thing, you cannot see how the design is actually created.  You can buy one and using the Alphabet Xpress software, you can check it out using the technique shown in The Computerist's Blog - Reverse Engineering a Design.  That will show you the digitizing techniques used.  You will, of course do a 'discovery sew' where you will be doing a sample/sew of the design under your circumstances. 

I did my discovery sew without a single problem on this.  I was so delighted with the placement and precise layout.  I did my sample on a hankie but it would be excellent for napkins!

 First, the instructions say to start with an adhesive stabilizer ready for the project.  I prefer Ann's Water Soluble Adhesive Stabilizer for several reasons.  First it is very reasonably priced, second, it performs two jobs and it has never gummed up my needles. 


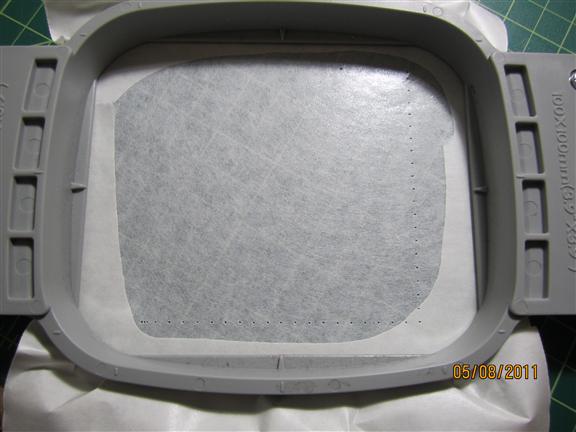
The first line is the placement line, just as you would do if you were doing an applique.


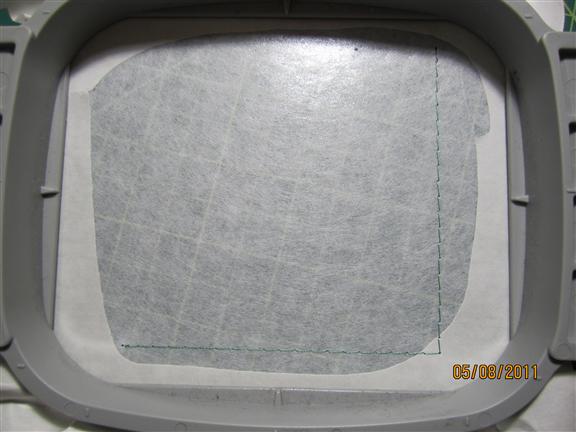
Place the hankie, napkin or other corner object on that line.


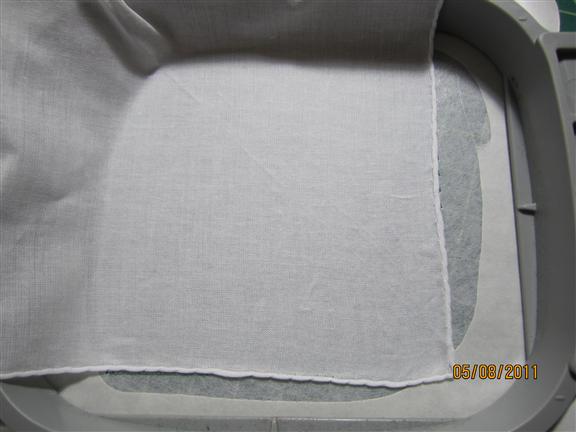
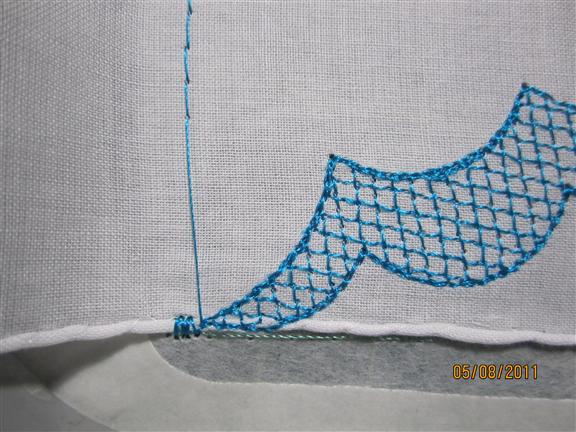
Sew out the first stitching of the design.


I was concerned about the edge being in the right place and this one is right on target.


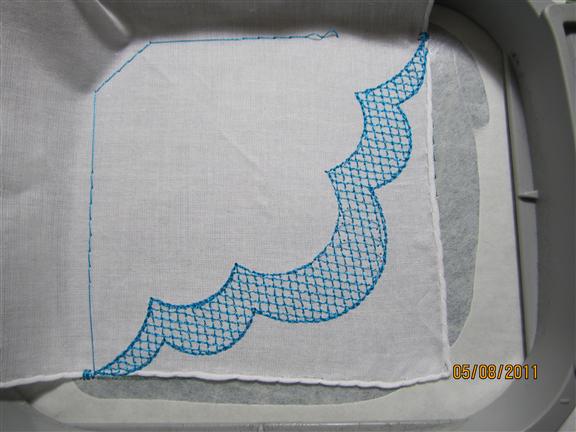
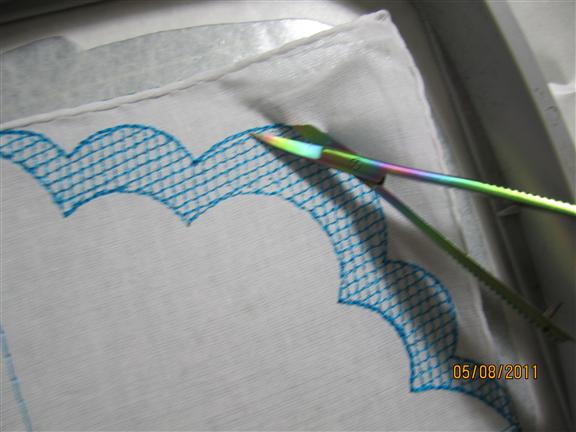
Trim away the fabric as close to the stitching as possible without cutting the stitching.


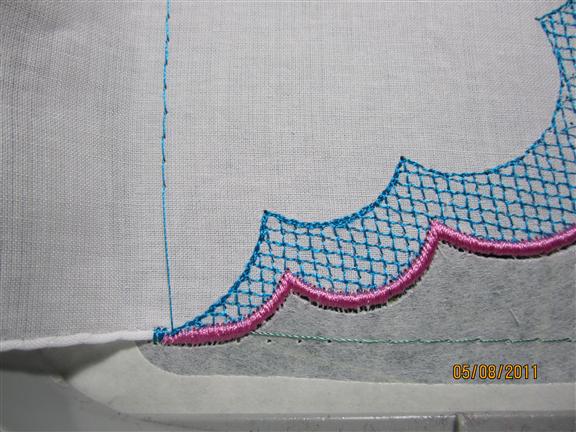
Place the next stitching and again, I am checking the line up of the edging.  What a great match!


The last selection of stitches is placed.  In this case, it included a fleur de lis, satin stitches and some lovely Candlewick style stitching.


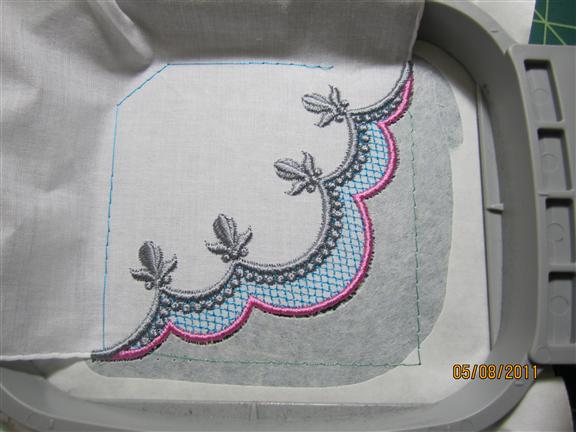
Here is my sample.  I love this design and feel it will be well appreciated by brides everywhere.


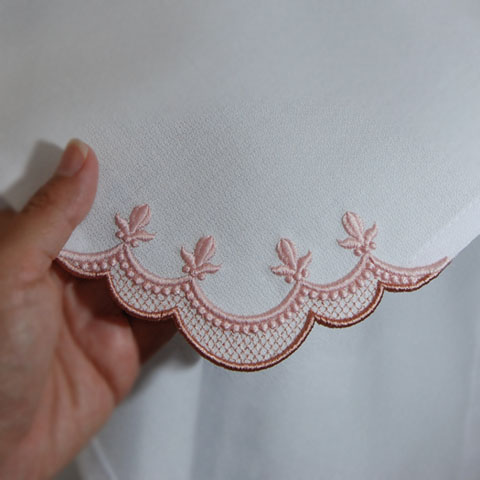
This  design/photo is courtesy of Soniashowalterdesigns.com 

Comments


kimmieann said:

This is beautiful...thanks for sharing, Kimberly

May 13, 2011 8:36 PM
 

Boogie1818 said:

You make it seem so easy that I will try it.  Your designs are beautiful.  What talent!  I envy it.

Jeanne

May 14, 2011 11:27 AM
 

pat71896 said:

These are not my designs, I truly wish I had such talent! But I was so delighted with this exact positioning.

I seek out the best and most innovative designers to present to you.  

All my blogs are about my experiences and I truly love doing the blogs.  I have even discussed my failures in my blogs.  That is what sharing information is all about.  Discuss the good, the bad and the ugly to get to the project for which you are the most proud.

Thank you for your comments, I appreciate them SO MUCH!

Pat

May 14, 2011 2:34 PM
 

Konno said:

I love your idea.  Where can I get that design you used?

May 14, 2011 6:37 PM
 

TheComputerist said:

If you look at the last photo, you can see the name:

soniashowalterdesigns.com  

That is the place to get the design.

Pat

May 14, 2011 9:43 PM
 

Fabricmaniac said:

How do you remove the sticky from the back of embroidery, I tried washing and it doesnt' work.  

Do I have to tear it off  bit by bit ?  

May 15, 2011 12:29 AM
 

TheComputerist said:

(for some reason I cannot sign in as The Avid Embroiderer, but have signed in as The Computerist)

Fabricmaniac - You need to be sure you are using adhesive wash away.  I really love the one here at Ann's (link is in the blog).  I have used another one without success so I recommend that you find what works for you and keep with it.  

One of the things about stabilizers is that I find I may not have good results and someone else swears by a certain brand.  The opposite is also possible.  I believe there are some things that may effect stabilizers like this:  the amount of hummidity in your area (I live in a low humidity place), the age of the stabilizer (if you have some really old stuff, it could have degenerated) or the length of time you leave it in the water. (Other things can be at issue as well.)

If you did not have it wash away, it was probably a tear away.  If you are sure it was wash away, you may want to consult where you bought it.

Pat

May 15, 2011 1:49 PM
 

SnazzyJazz said:

Thanks for the tip how to nail that corner. Will definitely try it on a hanky.

Marlene

May 16, 2011 7:27 AM
 

jokelleher said:

What a BEAUTIFUL gift!  I've never used sticky stabilizer

before and I am looking foreward to trying it.    Joanne        

May 17, 2011 3:46 PM
 

pat71896 said:

Thanks for all the comments, you cannot know just how much they mean to me!

I do want to reiterate that you need to be sure you are using an adhesive wash away.  The best of the best is the link in the 4th paragraph above.  I had trouble with the other brand I found.

Of course, you may not have any problems with your stabilizer.  I hope you don't.  I know you won't with Ann's Water Soluble Adhesive Stabilizer.  

www.annthegran.com/Product.aspx

Pat

May 17, 2011 4:00 PM
 

cme said:

These are beautiful. I can see this design on a set of napkins. Use either an initial or some dainty decoration that would go with the persons decor. Wonderful.

May 17, 2011 5:25 PM
 

susiesembroidery said:

Thank you very much for sharing this with us. I know that we are all trying our best to have superiour results. I found that a spray-on glue works very well for me in applique. That might be worth trying. I live in Durban, S.A. and it is very humid as I live on the sea. Maybe you could try this. I hope that it will help. Thankyou to Ann, the Gran, for the lovely designs and tips. I hope you will be very blessed. Love, Susie.

May 18, 2011 2:08 PM
 

pat71896 said:

Thank you cme and Susiesembroidery!

Frankly Susie I have more than my share of blessings and I appreciate each little thing that comes my way.

Thanks again to every one of you!

Pat

May 18, 2011 11:17 PM
 

tammyfincher said:

I have just recently started doing the machine embroidery and have really been enjoying it, trying new techniques, etc. that will work best for me. I TOTALLY love this design and hope to try my hand at it. Wish me luck !!  Thanks for sharing it..

May 25, 2011 1:54 PM
 

jeanguarino said:

Thank you for posting this little tutorial. It really never occured to me to use the basting line to line up the corner. I usually stitch a sample to use as a template and mark the item to line up with my hoop. I used the zigzag satin stitch afterwards to fix any oops. I like your idea better and am looking forward to trying it. Many thanks, Jean

September 24, 2011 11:58 AM
About AnnTheGran -  Contact -  Site map -  Privacy Policy -  Security -  Gifts -  Shipping/Returns -  Links -  FAQ -  Thread Charts -  Print
©2005 - 2013 AnnTheGran and its contributors.